|
(Not - only) Xmas colorful background and instructions about how to use it making a table This tutorial
was created and put online on November 18, 2002. Groups can freely link to it. I don't have
the time to assist people doing this tutorial, but if you have problems
downloading the supplies needed, please email
me.
See a floral example made by Faith:
This is an easy and colorful background to make nice stationery for the holiday season or to use as a background of your webpages. It's fast and simple! Your result will be different from mine, because it depends on the tubes you choose to use. You'll also find instructions about how to use the background on your site or in your emails.
This tutorial is rated
according to the FBNG's Skill Level Standard
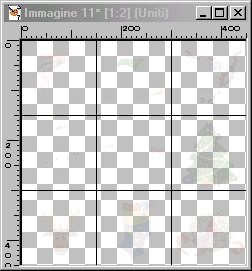
For this tutorial you'll need: - Paint Shop Pro, get it here - MuRa's Meister Copies Filter, get it here - Christmas tubes (9 of them) Let's begin! Remember to save often! 1) New image: 450x450, transparent 2) Go to View/Rulers and View/Grid. Now let's change the grid properties: View/Edit grid properties, unit: pixels, Hor and Ver 150, leave all the other settings as they are
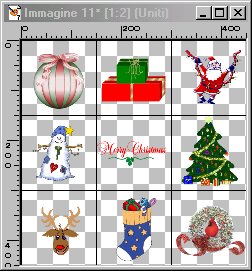
3) Add a new layer, go to your tube tool and find Christmas tubes. Put a tube in the middle of each square, resize them if necessary: they should be more or less the same size. Remember to add a new layer for each of your tubes, so that you can move them with your mover tool as you like best even afterwards. This is what I had at this point:
4) Layers/Merge visible 5) Effects/Plugins/MuRa's Meister Copies in the drop down menu ( bottom left) choose Wallpaper, leave the settings as they are, then apply. Apply another time choosing Tiling, always leaving the settings as they are. 6) Save. YOU'RE DONE! 7) Now you have the background, but it's too colorful to write on it, so you have the choice: either you lower the Opacity of the layer to 60-70, like this:
and you can write on it, or you leave it as it is but you make a HTML table. This is not difficult, just follow my instructions. 8) To use the background on your webpage: just copy and paste this HTML code between <body>and </body>tags, and you'll have a table like mine here, with a red border and a white background inside the table.
if you want to change the background color, change the bgcolor code from white ("#FFFFFF") to the code of the color you like, if you want to change the border color change the red ("#FF0000") to the code of the color you like. 9) If you want to use the background as stationery in your emails (in Outlook Express) first of all make sure you can send HTML emails (go to Options/send and check HTML). When you compose a new message, at the bottom you'll see the options Edit - Origin. Click on origin and copy and paste the above HTML code just before the </BODY> tag. Now go to Edit and write your text. That's it! YOU'RE DONE! Thanks for trying my tutorial :)
Tutorial Copyright ©dani 2002
|