

Pet Love Quote Tag
This tutorial
was created and put online on November 20, 2002.
Please do not copy or place this tutorial or any of the graphics on any site, or
send it through email.
Groups can freely link to it.
I don't have
the time to assist people doing this tutorial, but if you have problems
downloading the supplies needed, please, email
me.

I thought of this as a way to display your favorite quote, but you can also use it to send messages to a friend or to use in your emails as a sig.
This tutorial is rated
according to the FBNG's Skill Level Standard
For this tutorial you'll need:
- Paint Shop Pro, get it here
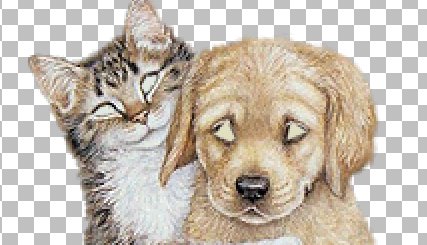
- These tubes, download them here: the petlove tube was created by Patao (thanks :), the lacedframe by KalamityKat (thanks :).
Both of them make wonderful tubes!
- a quote - you can find some beautiful ones here or here
(Mine is from "The little prince" by Antoine de Saint-Exupéry)
Remember to save often!
Let's begin!
1) Open the tubes you've just downloaded, make the lacedframe active, then go to Image/Resize by 70, then Effects/Sharpen
2) Make the petlove tube active, go to Image/Resize by 130, then Effects Sharpen. Pick a dark color from the cat for your foreground. Now in the color palette, left click on this color and note the numbers you have for hue and saturation
3) Make the lacedframe active, go to Colors/Colorize, write the numbers you have noted, click OK
4) Open a new image, 600x600 transparent, make the lacedframe active, Edit/Copy, make the new image active, Edit/Paste as a new layer. Make the petlove image active, Edit/Copy, make the new image active Edit/Paste as a new layer. With your mover tool move the images so that the puppy's paws are leaning on the frame, like this:
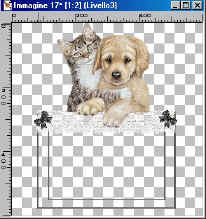
5) With your selection tool set on rectangle, feather 0, antialias checked, select a rectangle around the outer frame, then highlight the first layer (the background), pick a light color from the puppy, and floodfill the rectangle. If you have difficulty filling the entire inside select it with the magic wand, invert, then flood fill on the other layer.
Then go to Effects, Add noise: 25% uniform. Selections/Deselect.
This is what you have so far:
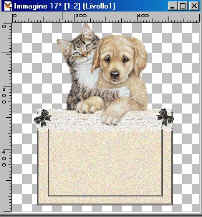
6) Layers/Merge visible. Image/Resize by 60, Effects/Sharpen. Save this image as petloveblank.psp
7) Shift D to duplicate this image. Make the image bigger to see better. Click on your lasso tool, point to point, antialias checked, feather not checked, trace the contour of the 4 eyes ( after the first selection keep Shift pressed to add the other eyes' selections)
8) Choose a light color from the dog ( near his eyes) and floodfill his eyes, do the same with the cats eyes. Deselect. Save this image as petloveclosed.psp
9) Duplicate the petloveblank.psp image two more times. Minimize one of them and make the other active. Add a new layer. Click on your text tool, foreground nul, background color: the same you used for the frame, mobile and antialias checked. Use a font you like and write the first part of your quote. I used size 28, but it depends on the font you are using. Put the selection in the middle of the tag. Effects/Drop Shadow, these settings: Hor and Ver 0, Opacity 34, Blur 3, color black. Deselect. Effects: Sharpen. Layers/Merge visible. Save it as petlovetext1.psp.
10) Make the other duplicated image active and repeat step 9 for the rest of the text. Save it as petlovetext2.psp. If your quote is longer than mine, you may need to add another image to finish writing your quote.
LET'S ANIMATE OUR TAG!
11) Open Animation Shop. Click on File/Animation Wizard. In the first dialog window choose: animation size as the first frame, in the second: canvas color transparent, third window: upper left corner, with the content of the previous frame, in the fourth: yes repeat indefinitely, 100, in the fifth add the images you saved in this order: petloveblank, petlovetext1, petlovetext2, petloveclosed, petloveblank.
12) You have now an animation made of 5 frames. rightclick on the first frame (the blank one) and choose frame property, set the duration to 50. Do the same with the second frame (the first part of your text) and set it to 125. Do the same for the second part of your text (always 125), rightclick on the next frame (with the eyes closed) and set it to 10, rightclick on the last frame (a blank one again and set it to 50.
13) If you want to resize it, go to Edit/Select all, then Animation/resize animation
14) Save the animation following the standard settings.
YOU'RE DONE!
Thanks for trying my tutorial :)

Tutorial Copyright ©dani 2002