

How to use a jpg image as a mask
This tutorial
was created and put online on June 12, 2003.
Please do not copy or place this tutorial or any of the graphics on any site, or
send it through email.
Groups can freely link to it.
I don't have
the time to assist people in doing this tutorial, but if you have problems
downloading the supplies needed, please email
me.
This tutorial is rated
according to the FBNG's Skill Level Standard
For this tutorial you'll need:
- Paint Shop Pro, get it here
- the three images I used, download them here
- Simple filter,, download it here
- Eye Candy 4000, download it here.
Remember to save often!
Let's begin!
1) Open the three images you have downloaded: the "sea nocturne" by Anita M. Olson, see her gallery here, the "true colors" by Jim Warren (visit his site here) and the mermaidmask.jpg image. Duplicate all of them and close the original.
2) On the sea nocturne copy: add a new layer. Go to Masks/New/from Image and in the drop down menu choose the mermaidmask.jpg, luminance of origin checked and invert mask checked. You can't see anything now, don't worry..........
3) Go to Selections/from mask. Highlight the true colors copy, Edit/copy, highlight the sea nocturne copy, Edit/paste into selections.
This is what you have:
4) Go to Mask/delete, and answer yes to the pop up window.
5) Go to Effects/drop shadow, these settings: Hor and Ver: 2, Opacity 100, Blur 2.2, color: #011560, repeat Drop Shadow only changing Hor and Ver to -2.
6) Effects/Eye Candy 4000/Bevel Boss, go to the Settings options and choose Subtle Button, go to the Basic Menu and uncheck Shade Interior. Click ok. Selection/deselect. Layers/merge visible.
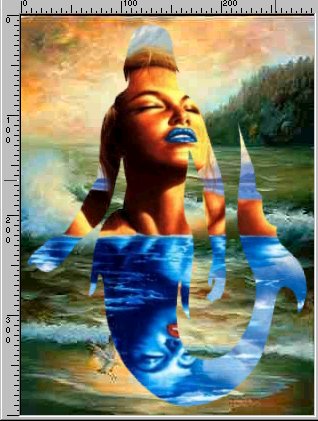
7) Highlight the sea nocturne image and Edit/copy, highlight the true colors image, Edit/paste as a new layer. Then go to Image/resize 85%, all layers unchecked.
8) Effects/drop shadow, apply twice, one positive and once negative as before
9) Highlight the background layer, go to Effects/texture/Mosaic antique, these settings: 41 41 symmetric checked, opacity 79, width 2, opacity 50. Layers/merge visible
10) Image/ add borders 10 symmetric, white. With the magic wand, highlight this border, go to the copy of the seanocturne and Edit/copy, highlight your image, Edit/paste into selections.
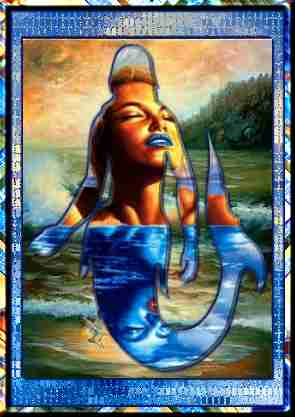
11) Effects/Plugings/Simple/diamonds. Effects /Inner bevel, round.
Effects/Drop Shadow, apply twice, same settings as before (positive and negative)
12) Resize and save as .jpg file.
YOU'RE DONE!
Thanks for trying my tutorial :)

Tutorial Copyright ©dani 2003